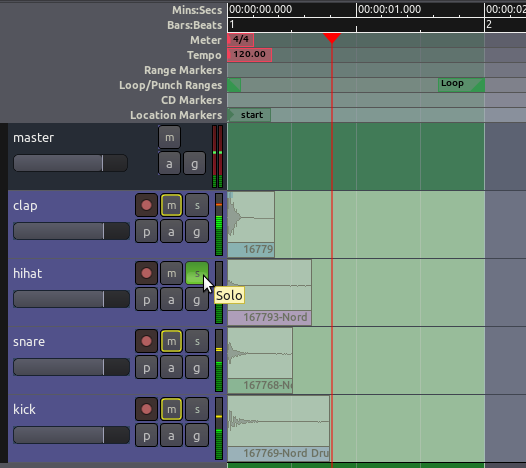
Sections of audio are called Regions in Ardour.
To compose the short rhythmic passage we’ve been working on, we will need to know how
to Select, Move, Split and Trim these Regions, as well
as how to Fade In or Fade Out their volume and create
Crossfades between them. Some of these options may need to happen at
specific Edit Points in the composition, or according to the musical
Meter we can define with the Timeline and the Grid as well.
Selecting Regions
The Grab Mode (shortcut “G”) is the tool to select and move objects. It is located just below
the Transport Menu in the Editor Window (the little “hand” icon). You
will use this tool a lot in your Ardour work.

When it is active, your mouse pointer will look like a little hand icon.
Try all of the operations below, for practice:
-
Click on the Waveform of the region to select it. Click and drag on
a region to move it around (left and right within the same track,
but also up and down onto other tracks).
-
Use “Control” + “Click” to create and drag around a copy of
the region.
-
You can select multiple regions by holding the “Shift” key while
selecting.
-
Move multiple regions at the same time after selecting them.
-
You can select several sequential regions on one track all at once
by holding down the “Shift” key while selecting the first and the
last Regions of the sequence (copy a few regions on the same track
to try this out).
- When you select a single Region, make sure to click on the Waveform
section of its rectangle. The lower stripe with the Region name is
used for a different action (see Trimming Regions below).
- Use the “Del” key to delete selected regions.
-
Standard copy (“Control” + “C”), cut (“Control” + “X”), and
paste (“Control” + “V”) operations also work with regions.
- You can also drag a selection box over multiple Regions to select
them all.
Moving Regions
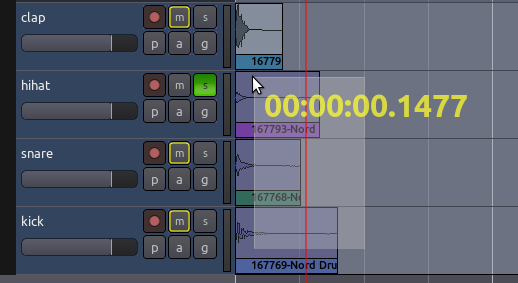
While moving a Region, a Timecode will appear on the screen in
yellow numbers. This Timecode is the Region’s starting point on the
Timeline. The unit of this timecode is the same as the unit of the
Second Clock, which you can change by right-clicking on the Second Clock
and choosing a new unit (Minutes:Seconds, Bar:Beats, etc).
You can move Regions horizontally (sideways) to a different point in
time on the same Track, or you can move the selected Region vertically
(up or down) to a different Track.
When a set of one or more Regions is selected, you can move the whole
set by dragging with the mouse.
Note: make sure to select the Region in its waveform section, because
selecting the bottom title bar area is used for a different action (see
Trimming Regions below).
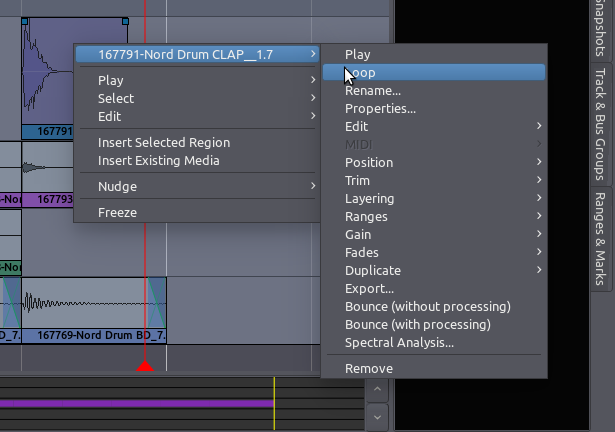
Duplicating Regions
In addition to “Control” + “Click” + drag and standard copy/paste,
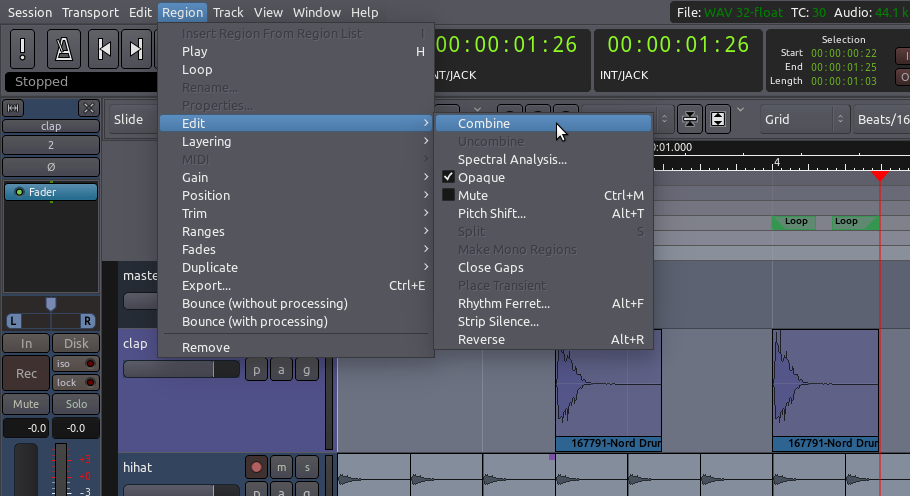
Ardour offers other handy ways to duplicate regions. Use the Select/Move
Objects tool to select one or more Regions, and use the Duplicate
function to make one or more copies (menu Regions > Duplicate).
Three options are available:
- Duplicate (shortcut “Alt” + “D”): make a copy of the
selected region on the same track, immediately after the original.
- Multi-Duplicate (shortcut “Shift” + “D”): make multiple
copies of the selected region at once (same track, in sequence). You
can specify the number of duplications.
- Fill Track: make as many copies of the selected region as needed
to fill the entire track, all the way up to the End marker on
the timeline.
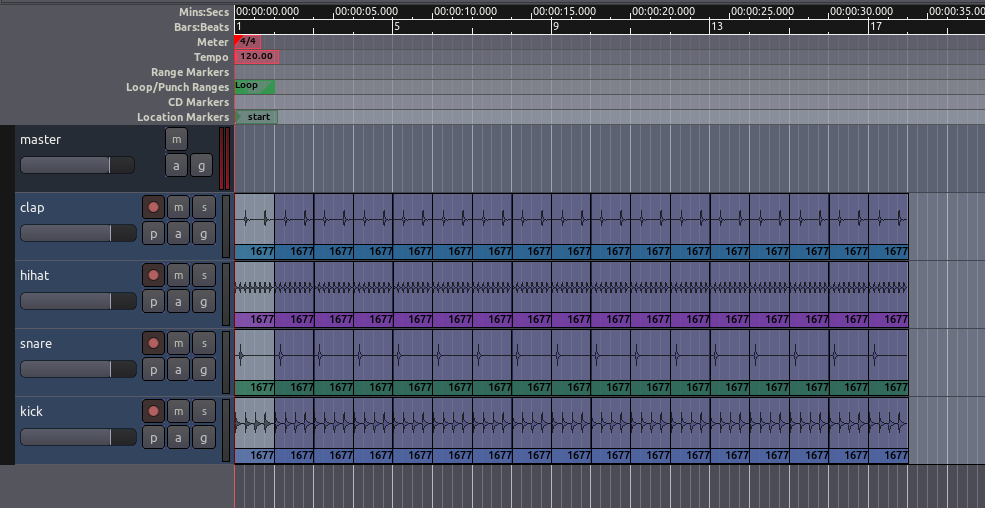
In the following screenshot, regions have been duplicated using the
methods above.
Using Edit Points
When you use the standard copy/cut/paste commands, where exactly will
the regions be pasted? The exact location is determined by the Edit
Point drop-down menu.
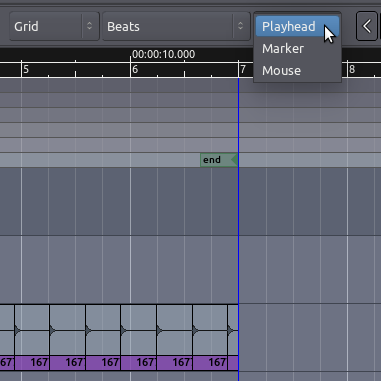
If Mouse is selected as the Edit Point, the copied Region will be
pasted at the current position of the mouse.
If Playhead is selected as the Edit Point, the copied Region will be
pasted at red Playhead line on the same Track where the original Region
is.
Finally, if Marker is selected as the Edit Point, then the copied
Region will be pasted immediately after the currently selected
Location Marker.
Markers
It is very useful to be able to tag different locations in a session for
later use when editing and mixing. Ardour supports several ways for
doing this. The most common method is using Location Markers, which
define specific positions in time.
Location Markers can be added to the Timeline by right-clicking on the
Location Markers strip and selecting Add New Location Marker. If you
don’t see the Location Markers strip, right-click on the timeline and
select it to make it visible. Location Markers can also be selected with
the mouse and moved to new positions. Right-clicking on a location
marker lets you rename the marker, among other options.
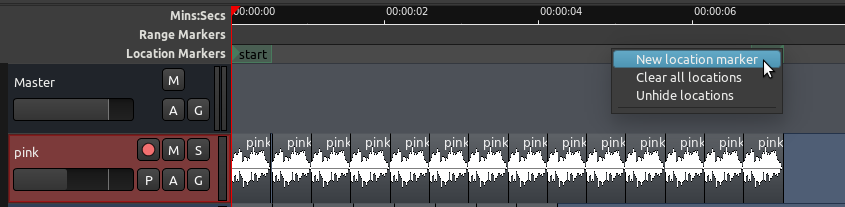
TIP: when you first create a new session, two location markers are
automatically added by default. These are the start and end
markers that you see in the screenshot above. If you don’t see the
end marker, zoom out enough and you will find it.
Splitting Regions
To Split a Region simply means to divide a single Region into two
independent Regions. There are two ways of accomplishing this:
- You can use the Cut Mode (shortcut “C”) to point and click anywhere you want to split; or
- You can stay in Grab Mode and use the shortcut “S” (for “Split”). In this last case, the point at which a Region will be split depends
on the currently selected Edit Point. If Mouse is selected as your
current Edit Point, select a Region and place the cursor at the point
you would like to Split, then type “S” (same as going to menu Edit > Split Region).
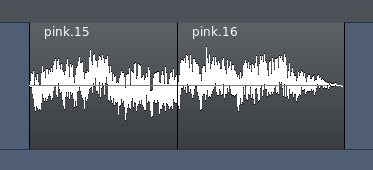
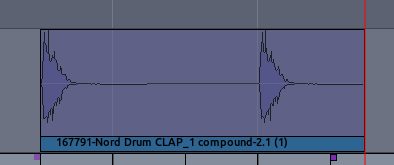
After being split, the original single Region becomes two independent
Regions, with a new name for each, as in the image above. The two new Regions are now entirely independent. You can move and edit
them separately.

Regions can also be split by using the Playhead or a Marker as the Edit
Point.
Trimming Regions
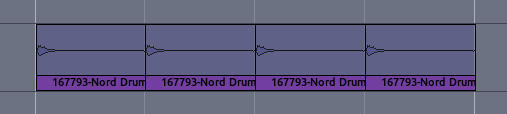
If you move the cursor near the left or right side edge a Region, you will see that the pointer becomes an arrow. Click and drag
inwards from either end of the Region, and the Region will be shortened
accordingly. This is called Trimming the Region. Regions can be
trimmed from the start of the Region (drag from left to right at the
edge) or from the end (drag from right to left).
This action is non-destructive: no audio is actually being deleted. It
is as if you were just “hiding” those portions of the Region that you
don’t want or don’t need anymore. Later on, you can “un-trim” the Region
(i.e., extend it back to its original full size), even if it has been
moved or copied to a new Track. A trimmed Region will receive a name
derived from the original name of its parent Region, and you will see
this reflected in your Region List. For example, in the images above, a
single original region named sample_01 has its trimmed versions named
as sample_01.1, sample_01.2, (…) sample_01.15, and so forth.
TIP: Trimming will obey Grid settings. If you don’t want your
trimming to be constrained to any grid, simply turn the grid off (No
Grid).
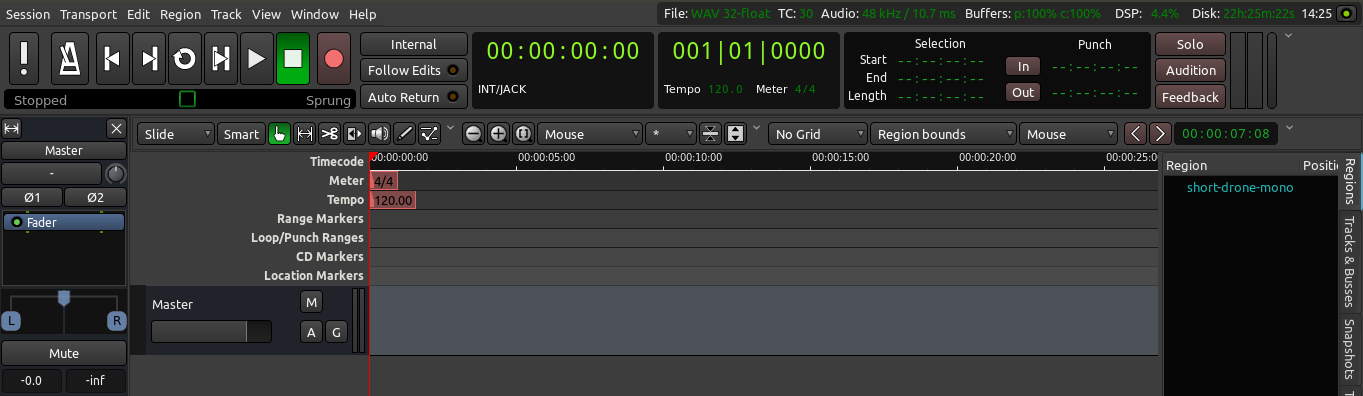
Deleted Regions
Because Ardour is non-destructive, the Regions you have deleted from
tracks are not completely removed from the Session. They can always be
accessed again from the Region List on the far right side of the Editor
Window (Regions can be dragged from the list onto any tracks).
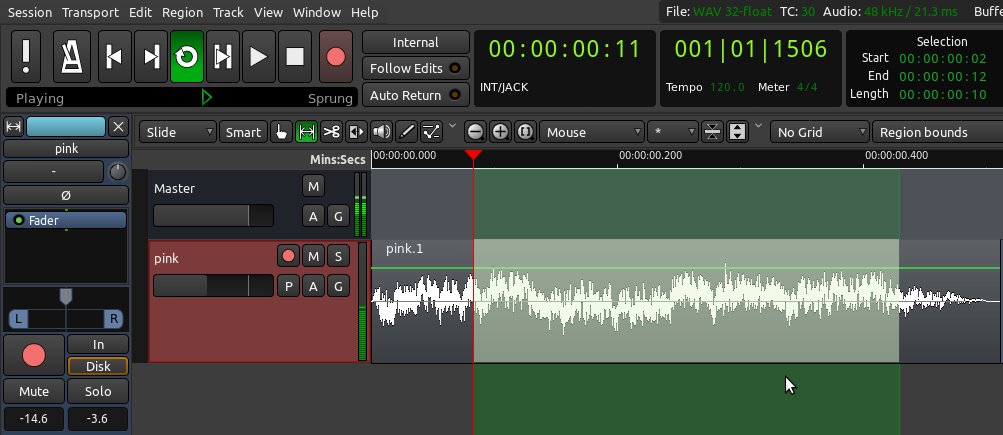
Creating Fades in Regions
A Fade is a change in the volume of a Region, either as the Region
starts or as it ends. A Fade at the start of the Region is a Fade
In, and at the end of a Region it is a Fade Out. Each Region has
two small handles along the top corners, which can be dragged inwards
from either edge to create a Fade In or Fade Out. The screenshot below
shows a Fade In (indicated by the shaded blue area).
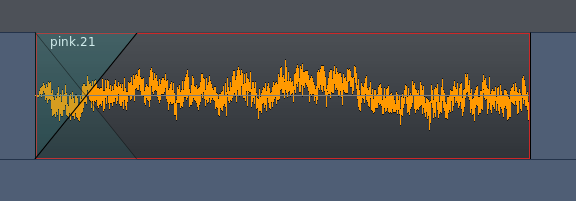
In fact, every Region has a Fade In and Fade Out built-in. By default,
the region fade is very short, and serves to avoid clicks in the
transitions at the start and end of the region. By adjusting the regions
fade length as shown above, a more gradual transition can be
accomplished.
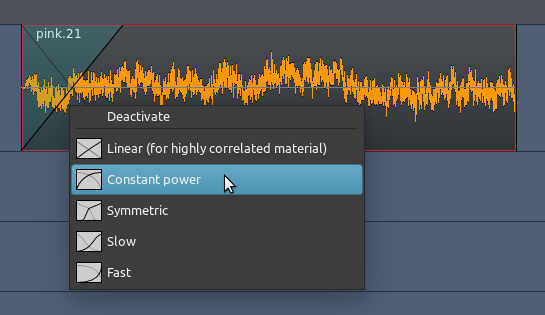
By right-clicking on one of the Fade (the shaded blue area), the speed
of the Fade can also be adjusted.
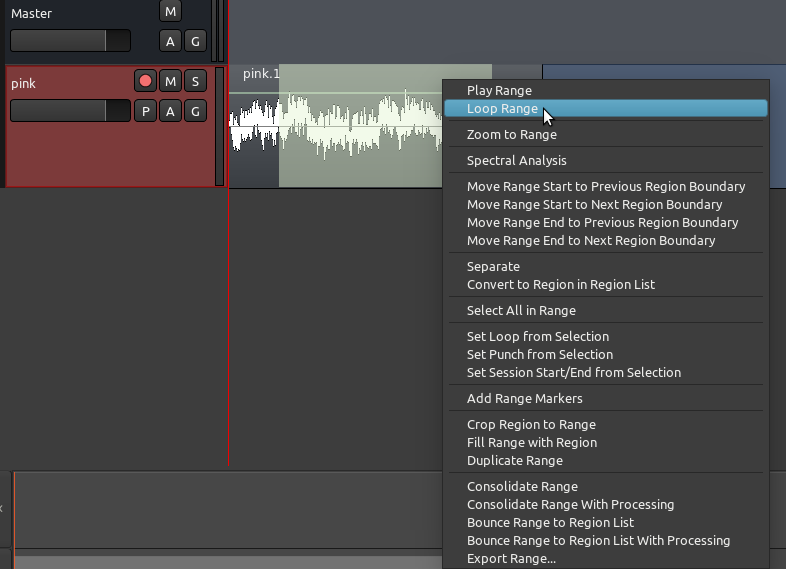
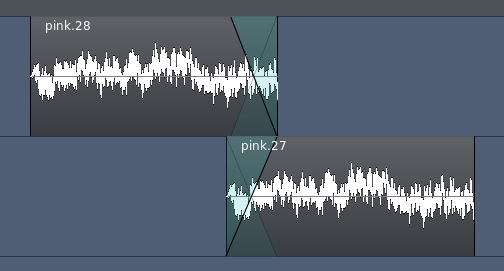
Crossfading Between Two Regions
When one Region Fades Out while another Fades In, this is called a
Crossfade. If the two Regions are in different Tracks, you can use
the method described above with the Fade In and Fade Out handles. The
following screenshot shows an example.
However, if both Regions are in the same Track, you need to overlap them
in order to create a crossfade. When regions overlap on the same track,
Ardour treats them as layers, that is, one of the regions is
considered to be on top of the other. The important rule to understand
is:
The Fade In (or Fade Out) of the topmost region represents the
crossfade between the two regions.
Once you understand this principle, it’s easy to create and control
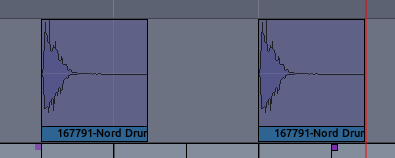
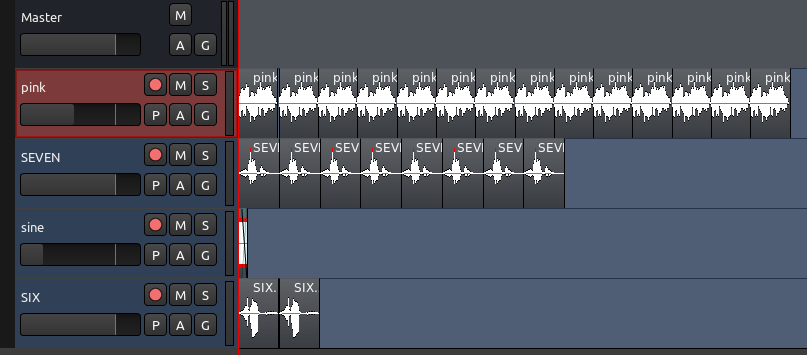
crossfades between regions. Here’s an example. The two separate regions
seen below will be made to overlap in order to create a crossfade.
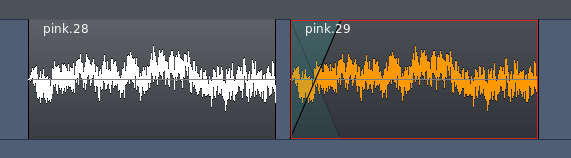
Note that we did not add any extra Fade Out to the first region, but we
did add a longer Fade In to the second region. Then we drag the second
region partly on top of the first:
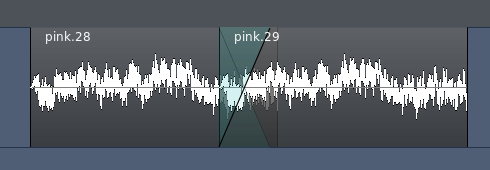
The Fade In of the second region works now as the crossfade between the
two regions. In other words, the first region will fade out in a mirror
image way as the second region fades in.
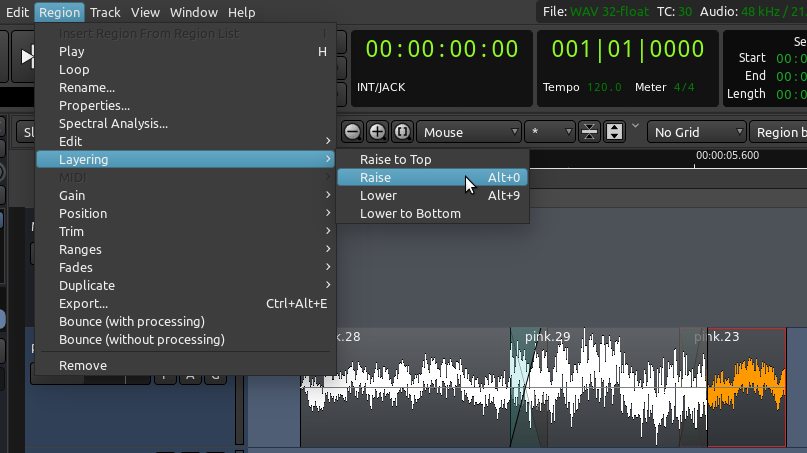
In order for this to work, though, we need to make sure that the region
that has the desired fade is on top in Ardour’s layering system. In
order to change layering of regions, select a region and go to the menu
Region > Layering.
The difference may be hard to hear if you are doing this with the very
short percussive sounds we imported earlier. To really hear the effect,
import a couple of longer samples to try it out (for example, a sample
of rain sounds, and another of a human voice). Overlap several seconds
of your long samples on the same track. You will hear the difference as
you move the second region to the bottom (“Lower to Bottom”), and then
back to top (“Raise to Top”). When it’s on top, we will hear the desired
crossfade. When it’s at the bottom, we will hear no crossfade, just an
abrupt change from first to second region (assuming your first region
has no Fade Out specified, as in the screenshots above).
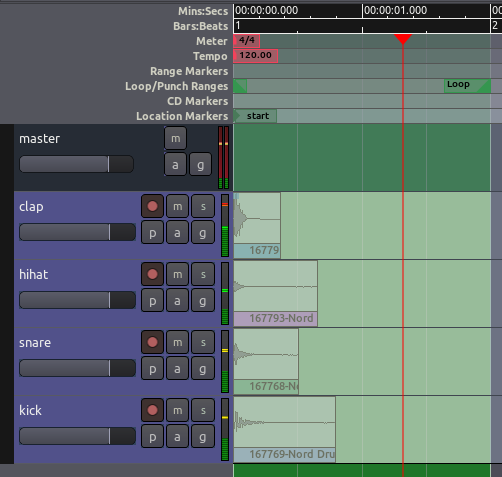
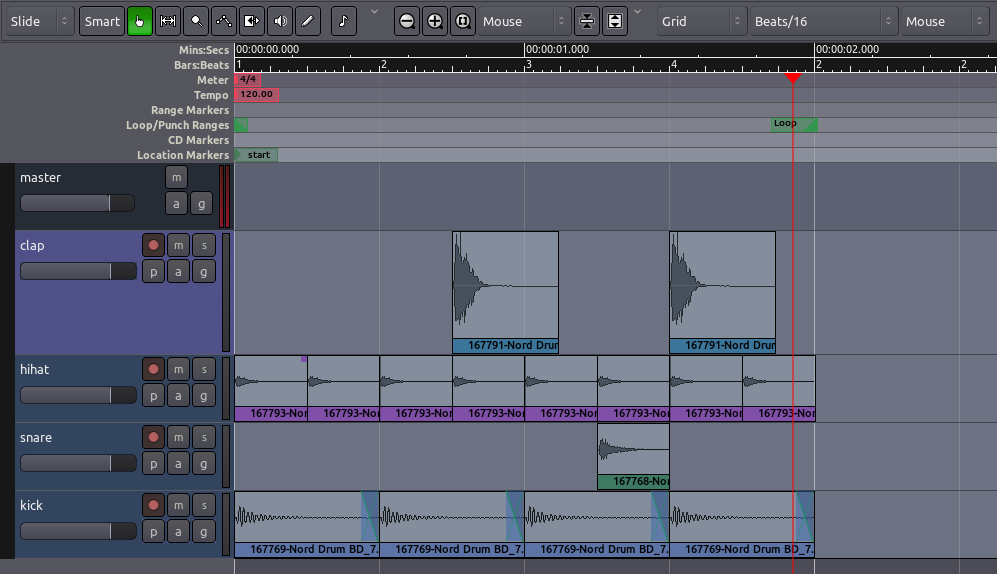
Using Grid Settings
Experiment with the Grid setting, as discussed in the Setting Up
the Timeline chapter, to give different kinds of Quantization—in
other words, to constrain the boundaries of each Region to certain grid
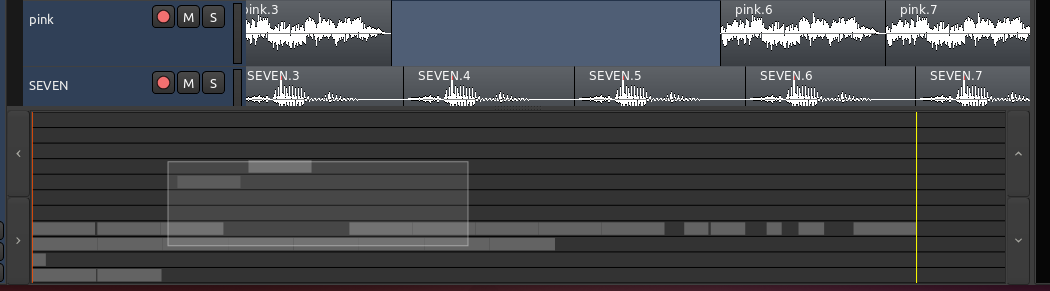
points. Here, the Grid has been activated and set to Beats/16, to
quantize the Regions to sixteenth notes within each bar. You may wish to
Trim the endpoints of some of the samples, as discussed above, to fit
within the metric structure you have set up (for example, the hihat
samples in the screen below have been trimmed so that they don’t not
overlap with each other).
Continuing
In the next chapter, we will explore a few more things you can do with Regions
Next: FURTHER REGION OPERATIONS